Showing posts with label On30. Show all posts

Saturday, October 15, 2022

Adventures on the Kennebec Central Continue

I continue to utilize my new 3D printer for some really fun two foot cars. I've always thought that some Kennebec Central opening side door gondolas would be really neat to build. A challenge for sure but really neat. As I learn how to use my printer settings and the best ways to arrange and modify supports (the things that hold your model off the build plate while it is printing), I'm making some really cool cars.

A big THANK YOU to Chris Schmuck! Chris has posted some amazing stl files on Thingaverse and allowed others to print them. Designing in 3D is rather difficult and time consuming. His work is excellent and scales up from HOn30 to On30 or On2 very, very nicely. Here's the latest prints. Some slight modifications to the bolsters and coupler pockets. 

Basically this car is printed entirely in one go. The only details that are added are: queen posts, turnbuckles, truss rods, brake wheel, brake staff, a rod in the middle, couples and trucks. Clean up was easy though I did have to heat the car in hot water and carefully bend. The truss rods put a bit of pressure on the car, so I'm sure it won't dip but it may bend up! We'll see what happens over time. Two prints, one On30 using Chris's trucks and one in On3 using GrandtLine trucks. 

On30 K&C Short Gondola 


On2 K&C Short Gondola


Wednesday, September 8, 2021

41st Narrow Gauge Convention, Hickory, NC

Last week, I managed to attend two days of the 41st Narrow Gauge Convention in Hickory, NC. A wonderful time with lots of cool models, vendors, and clinics. Due to my short time there, I did not get to see all the wonderful clinics or travel to any of the home layouts. I did, however, manage to present my two clinics, one on the Albion module and one on the Cairo and Kanawha and the Mountain Central. I actually met two folks interested in the history of the Mountain Central and one modeling the WW&F in On30!

Highlights included hanging out and catching up with modeling friends I haven't seen in a long time, attending Pete Leach's backdrop painting clinic and buying some WW&F kits that I didn't know were out!

Here's some photo's to give you the flavor of the event.

Two nice On3 2-8-0's


West Virginia Midland Baggage Car!


The EBT On3 Module


Pete Leach's Backdrop Clinic


My backdrop completed with a few comments from the peanut gallery

The contest room


If only these were used in the mountains!


Tom's 2nd place train!


Wednesday, July 21, 2021

Arroyo Tram gets a Porter

 I recently finished my third 18 ton GrandtLine 0-4-0 porter. This time, I used an On30 conversion kit to make the locomotive On3. The kit basically includes two frame spacers, two helical gears (needed due to the narrower frame) and a new rear frame/ashpan front (the frame inserts into this piece). These gauge conversion kits were also made for On2 and I hope to have another conversion done by 2022 for the On2 module. We'll see. 


GrandtLine porter kits are an amazing box of parts and wonderful kits to build. Once in a while, its good to read ahead in the instructions to know why you are doing something and how important it might be to do at that particular step. They can be really difficult if you don't know what all those pieces are for. It's a good idea to familiarize yourself a bit with what small steam locomotive parts actually do. Cliff Grandt did an amazing job of designing a scale model. Sometimes a little too to scale and you might wish that clearances were a little greater or certain parts a little oversize for strength.

I prefer the look of the saddle tank cut back behind the smokebox, so that was my only modification from the kit. I filled the saddle tank with lead shot for weight, leaving the boiler for a speaker, stay alive capacitor and a soundtrasxx economi. I  picked up two of the economi's before they went out of production. Great sound decoders at a reasonable price. Why not use a TCS WOW decoder? Well, they don't work well with the Faulhaber geared cordless motors. I can't use them in any of my PSC shays with the Faulhaber motor, nor any of my GrandtLine porters. Soundtraxx and ESU decoders do work well with these motors.

Biggest Headache
The porters do not use a gearbox. The motor fits snuggly in the ashpan/firebox but the alignment of  the motor relative to the axle is critical. How do I know? I could NOT get this engine to run well backwards. There always seemed to be a bind in the mechanism. Note: In every GrandtLine porter I have built, there has been a bind. Usually I associate this with the side rods being slightly too short from center hole to center hole. Maybe shrinkage in the plastic? Not sure but I've struggled with binds in all three locomotives. To avoid this, I ovaled out the holes a bit in the rods during construction to assure a bind-free locomotive. You can see the "slop" in the rod in the video. Worked great. After painting and assembly, major issues. Huh?!


So, after disassembly, messing around, I determined that the bind was in the drive and by moving the motor up and down slightly, I could eliminate the issue. So, I glued the motor in and reassembled it. Still a little bind in reverse but great moving forward. A gearbox would definitely eliminate this issue. If someone out there could develop a gearbox for a different motor, I bet San Juan (new owners of the GrandtLine moulds) might be willing to produce these again.....otherwise, I doubt it.

Regardless, a great looking and sounding engine that is fun to build and a pain to get running well. Maybe the next one will go easier?

Friday, June 18, 2021

Vacation Time

While visiting my in-laws recently, I had the chance to visit fellow modeler extraordinar Jeff Kaker, who is modeling the Manns Creek in On3. Jeff has an amazing talent for trying new techniques and succeeding in miraculous ways. He also happened to be a very talented modeler. I'll post his work in the future, some top secret cool stuff awaits.......While visiting, he managed to arrange visits to three amazing layouts. 

The first layout was built by Patrick Thoney. Pat is modeling the Quincy and Torche Lake in On30. Pat was a VERY gracious host, he lined up the other two layout visits, planed our outing, then replanned the outing when I had to modify my plans AND then treated us to lunch. Supper fantastic! While I've had a moderate interest in the Q&TL over the years, I've never seen anyone build a layout representing the line. There have been models, rock cars, engine house, water tank, etc. but this was the first operating layout based on the Quincy that I have seen and what a fine job it is! While I've seen his work on Facebook, I've never been able to grasp how it was set up, i.e. how it ran from one end to the other. Great track plan and I hope to get back someday to operate.


Two overview videos of the layout:


The next layout(s) were done by Gregg Condon. Gregg had both a full HO and a a full HOn3 layout. I want to say he build the Hon3 layout in 16 months? Whew!  His HOn3 layout is based on the RGS and has been featured in the NG&SLG many times. It was a quick visit and I felt that the photo's in the NG&SLG do it much greater justice than my cell phone. Here are Jeff, Gregg and myself in front of this station building, where dispatching occurs.


The final layout we visited was built by Jack Gutsch, and is based on the Chicago and NorthWestern narrow gauge in the Black Hills. The line was originally the Fremont, Elkhorn and Missouri Valley, a narrow gauge that used 4-8-0's exclusively. The Black Hills was full of cool narrow gauges, three different ones that eventually became two competitors. While there are several good books on the subject, this one is free online : Railroads of the Black Hills While this area has great history, scenery, logging, mining, little and BIG narrow gauge engines and trolleys, I've also never seen it modeled. Jack has done a wonderful job capturing the feel of the line and the surrounding area. I was impressed with the size of the towns that the line passed through and all the structures he had to build. 


                                        Overview of 1/2 the layout room:


Pat, Greg and Jack were all great hosts and each had a unique perspective on modeling. I really hope to get back to the area to operate on these fine layouts. I hope you enjoyed seeing the results of our visit to these fine layouts in Wisconsin.


Sunday, February 21, 2021

Boxcar 312 and Shadow Box for the Arroyo

WW&F On2

I recently finished my version of WW&F boxcar 312. The car was one that had it's roof raised and there were lateral side boards on the top of the car on one side and the other had them only on one side of the door. Interesting kitbash. I started with a TrainTroll WW&F 309 boxcar kit and modified it a little. Why? Well, I thought the kit was great and would make a great Christmas gift. I think it came out quite well.


Arroyo Tram On30

I have also been working on getting the much needed backdrop up on the Arroyo Tram. I've added LED lights and and a "Shadow Box" style valence. Lesson I learned the hard way: I tried to get the same LED's as used on my WW&F module. Oops! I got ALMOST the same thing. Turns out these are 60 LED per meter not 120 per meter! Makes a big difference in the brightness. Too many variables with these things. Type of LED, color, dimming, and how many per meter. Regardless, having something blue in the background really looks much better than cinder block wall and the painted valence makes it look for finished. More backdrop painting to come. Mountains and stuff. Maybe I'll procrastinate a while...........


Friday, June 12, 2020

Arroyo Tank Car Revisted and More

I recently finished up, i.e. painted, a couple of On30 projects that have been ongoing.

First is the new Arroyo Tram tank car. The model is my version of the Gilpin Tram tank car that was built in the C&S shops. The tank car was used to haul water to mines that had "bad" water for their boilers.


I also finished up and painted a Chivers Finelines flatcar, freelanced but based on the Gilpin cars. My last such kit. Sorry to see them go out of business.

Modern Cars........

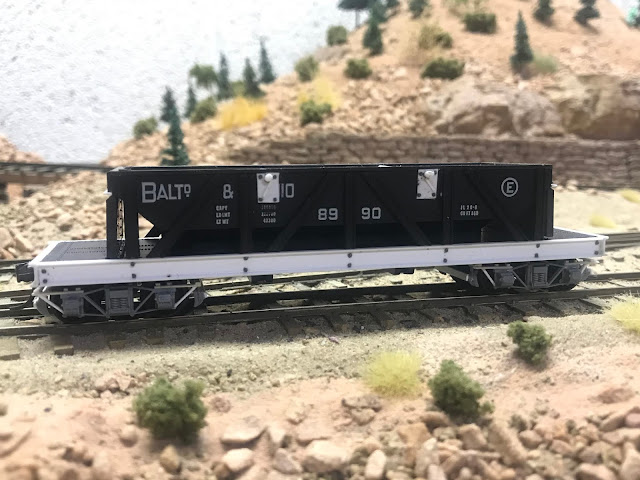
Here are two all steel ore cars based on the old Roundhouse or Model Die Casting ballast cars. Years ago, I had seen a kit-bashed version similar to these. I have no idea where I found the picture but I liked it and picked up a kit to bash.

Long time later........I bashed this up so quickly that I bought a second one on ebay, super cheap. The only difference between the two is how I did the ends and where I located the chain turning mechanism to open the drop bottom doors.


I wanted to use trucks that have brakes that hang from the trucks, as per Gilpin style but SlimRails or the "new" Chivers Finelines closed down a few years back. So, while looking at Tichey archbar trucks, I wondered if they could be modified? Yes! A fairly easy and quick conversion though I had to wait between steps for the adhesive to dry completely. I think they came out very nicely and plan to modify a few more. I was even able to use the brake shoes that come with the truck kits.

The Chivers Finelines trucks are on the left and my modified Tichey's are on the right. Yes, I used smaller wheels to get the right coupler height but one could easily use larger Kadee wheelsets. The picture is mid production, so only one set of brakes is shown. The finished and painted trucks are in the picture of the completed car above.


Thursday, May 7, 2020

Time Warp!

IC on the Arroyo?! Well....it IS On30, right? 

Bill's comment in one of my previous posts is the motivation behind today's. While attending a very interesting (zzzzzz) Zoom meeting today, I pulled out my old Backwoods Miniatures On30 diesel conversion. It's never run very well, and I've been stumped by why not. Each wheel supposedly picks up current. The basis is an old Athearn SW-1500, something like that.  It has a WOW sound decoder (darn thing talks to you when programming - doesn't really help make things clearer....) So, I messed around a little and used some contact cleaner on the the trucks and voila! Well, as voila as this loco is going to get. Runs fairly smooth while switching at really slow speeds. So, a little more weathering and some windows and I'm gonna call her done (oh, yeah a number). I originally picked this up for my On3 layout to use in staging but I'm not going to convert it. So, in the end, thanks Bill.


Friday, May 1, 2020

Proof of What You Already Know but Don't Want to Know

I've been running trains again on the Arroyo Tram. A nice relaxing way to end the day. Operations run from 20-40 minutes. While I use computer generated switch lists on the DC&L and have used them on the Arroyo, I wanted something simpler for such a small layout. I didn't want to use the computer (I'm on that for work all day it seems) and I wanted something quick that I could just walk up to the layout and use on demand. So, I pulled out my old box of Micro Mark car cards and waybills. I re-read an old MR article by Malcom Farlow on using car cards for his San Juan Central, looked quickly at Tony Keoster's Operations book and sat down to come up with something.

What a quick way to come up with something! In less than an hour, I had the cards and waybills written and the boxes installed. Started operating. Quickly learned that I need more cards. I then used an Excel program written by a German narrow gauger that I found on line about 10-years ago to generate 4-sided waybills. Still works! I worked up some better waybills and off we go!

 The system is working great. I can just walk up without any planning an start operating a train. I can walk away and come back when I want to. Easy, simple and quick, which is what I wanted for this particular layout. Operations have identified three things that I knew but didn't really want to be reminded of:

1. I need to build something to put the cards on! I always put the cards on the layout, on the scenery. Bad! I need to build something on the fascia to hold cards. On the to-do list, maybe you'll see it posted...NEXT YEAR!

2. I need to install a Tam Valley frog juicer. One single frog juicer hooked up to all my turnouts will work great since I only run one locomotive on each module at a time. I just need to do it as I'm getting stalls on the frogs. No, none of these loco's have stay alive's.

3. I have too many cars. I've known this. I just can't help building cars. If you've followed my blog for any period of time, you'll realize that what I really like about the hobby is building things. There are so many opportunities to scratch build or kitbash cool cars for this On30 layout! However, I need less than half to run the layout effectively. With less than 1/2 the cars, I still have plenty of switching, it looks better and I have enough sidings to handle traffic. With all my cars, well, everything is full and operations are, well, not that realistic. Heck, it's a small layout, what did I expect! Basically, it is an L-shaped layout with one 2 x 8 section and a 2 x 6 section.

What to do with all those cars...... and I'm building more. Oops! I'll have to find somewhere to store them, maybe make a drawer under the layout - you'll see that posted in.......2-years!

So, I'll get that Tam Valley frog juicer installed this weekend, get over 1/2 the cars off the layout and someday build that little sloped table to hold car cards but in the meantime, I'll be building more stuff and running the occasional train on the Arroyo Tram.

Thursday, April 23, 2020

Grand Central Gold Mining, On30 Action

April is almost over and I haven't posted! Lots of projects ongoing but few finished. I did get my Grand Central Gold Mine interior completed enough to share. The interior is a kit by Wiseman Model Services and includes all the equipment. I've added a few details. I would like to add some figures and interior lighting. Outside needs two rail sections, one to load cars and the other to a small tailing pile.


I also finished ballasting the Arroyo Extension and added a little scenery. Hoping to get the rails cleaned up and running again soon. 


Monday, March 9, 2020

Arroyo Tram Engine House

The Arroyo Tram received a new engine house. I scratch built the engine house based on plans for the Gilpin Tram's engine house that appeared in the NG&SLG. I modified the length to two stalls and left of the shop facilities off the rear. No doors at this point, I think they might cause problems with the location of the tracks on this module. I think it came out nicely, now to get some scenery on this portion of the modules!

The prototype from Keith Pashia's Freerails blog on the Gilpin Tram: http://www.freerails.com/view_topic.php?id=4599&forum_id=17&jump_to=84368