Tuesday, December 28, 2021

Hauling Bark with a Stone Boat?

Merry Christmas! It has been a while since my last post. Over the last week, I have been working on a little scene for the logging railroad - a horse hauling a stone boat. What is a stone boat you ask? It was a very simple "sled" used to haul stones out of early farmers fields. 

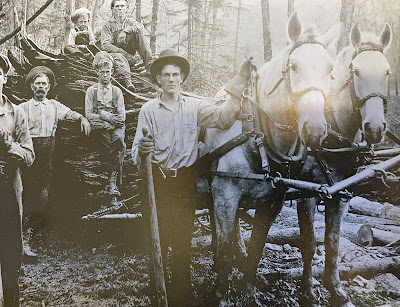
These simple sleds were then adopted for many other purposes, such as hauling extract bark to landings at logging operations in the Appalachian mountains. Below is a team working on pulling a stone boat with bark extract on the logging operations outside of Richwood, WV. Several operations also used single horse pulled stone boats, which is what I decided to model. One less horse to paint.

I scratch built my stone boat with stripwood left over from other projects. I carved the sled runners and added the stakes. The horse is from Aspen Models, where I removed the blinders. Most horses used in for log skidding and bark hauling did not use blinders. Now all I need is someone to hold the rains.

See you in the New Year!


Thursday, September 30, 2021

Wiscasset Expansion!

Over the weekend, I expanded track on the Wiscasset (staging) module to accommodate the newly built cars and for operation. While the expansion was short, it added some much needed space for accommodating the new boxcar fleet. Managed to have some fun with the static grass applicator.

The start


Tools, including the Fastracks On2 track gauge


The finished product with scenery


Monday, September 20, 2021

New Cars for the WW&F

I was quite surprised to see several ON2 WW&F Mount Blue Model kits at the Narrow Gauge Convention in Hickory, NC, of course, I had to pick them up! I'd seen them listed as "Coming Soon in On2" for the last few years and I guess had quit checking the website. A pleasant surprise for me! I picked up kits for box car 80-82, box car 306-319 and way car 303. Wonderful kits that are well thought out, relatively easy to construct and really neat to see how the owner used laser cut parts to make a prototype model. My new favorite kit manufacturer! Well, right up there with Train Troll for well designed, complete kits. 

The cars have an interior if you want to leave the doos open. Here is a a start of one of the 300 series within the first day of construction.


How cool is this. The end beans are mortised to accept the sills. Helps for a quick and square assembly. LOVED this!


Overall the instructions were very good. Only one area they fell short. The suggestion is to use Kadee #5 couplers and there is a really cool system for mounting couplers without the plastic box. Only one problem, the coupler body and spring, or brass spring system for #5's, won't fit between the sills. Maybe there is a way to do it but no mention in the instructions. So, I cut the ends and installed mine the traditional way. 


All that is left is to do a little paint touch up work, number and weather these great kits. More rolling stock for the Albion module!


Wednesday, September 8, 2021

41st Narrow Gauge Convention, Hickory, NC

Last week, I managed to attend two days of the 41st Narrow Gauge Convention in Hickory, NC. A wonderful time with lots of cool models, vendors, and clinics. Due to my short time there, I did not get to see all the wonderful clinics or travel to any of the home layouts. I did, however, manage to present my two clinics, one on the Albion module and one on the Cairo and Kanawha and the Mountain Central. I actually met two folks interested in the history of the Mountain Central and one modeling the WW&F in On30!

Highlights included hanging out and catching up with modeling friends I haven't seen in a long time, attending Pete Leach's backdrop painting clinic and buying some WW&F kits that I didn't know were out!

Here's some photo's to give you the flavor of the event.

Two nice On3 2-8-0's


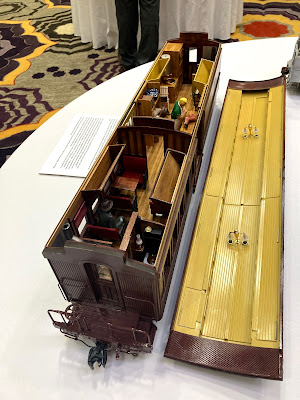
West Virginia Midland Baggage Car!


The EBT On3 Module


Pete Leach's Backdrop Clinic


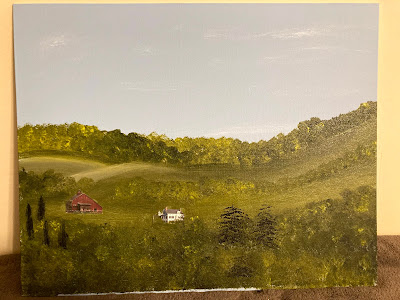
My backdrop completed with a few comments from the peanut gallery

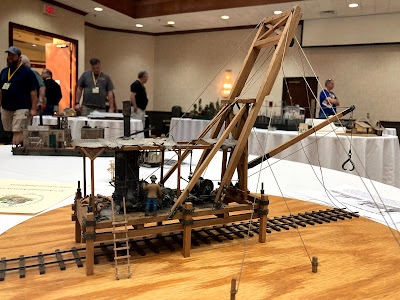
The contest room


If only these were used in the mountains!


Tom's 2nd place train!


Monday, August 16, 2021

Another EBT car and Starting Portland Locomotive Works RPO

While I am still working on painting several of the kits that I built over the summer, I recently started a kit that I have long been putting off. Not exactly sure how I decided to start this kit, regardless, I did and managed to get it finished without the expected major difficulty.

A few years ago, I picked up some PSC EBT hopper car kits for a friend that was looking to pass them on to another Eastern narrow gauge modeler. At the time, I was very concerned about the heat flow through the pieces and that what I had soldered would come un-soldered as I worked on other portions of car. 


I used a standard, large soldering iron tip for the majority of the model. Interestingly the large tip put a lot of heat in the think metal exactly where I needed it, without having it transfer to other areas. This worked so well, that I even used the large tip for most smaller details. I did use a small round tip for some of the brake details and twice used a resistance soldering unit. I'm guessing this worked well due to the small size of the parts and the thinness of the the brass sheet parts?

The most difficult parts were the steps for the brake wheel and the supporting brakes. I may redo these at some point. The car is essentially finished except for more cleaning of overdone soldering joints. I'm going to take a breather before the finishing touches. 


I think the car came out fairly well; however, I would say for the price, the pain and the time, the Bachmann On30 cars convert to On3 MUCH more easily!

This weekend, I started the Portland Locomotive Works WW&F RPO. The assemble has gone VERY quickly, as it is so similar to the passenger car kits that they produce. Waiting for the paint to dry for the next coat, then the gloss coat. The roof needs the trim over the doors that prevents water running down. More soon.........


Wednesday, July 21, 2021

Arroyo Tram gets a Porter

 I recently finished my third 18 ton GrandtLine 0-4-0 porter. This time, I used an On30 conversion kit to make the locomotive On3. The kit basically includes two frame spacers, two helical gears (needed due to the narrower frame) and a new rear frame/ashpan front (the frame inserts into this piece). These gauge conversion kits were also made for On2 and I hope to have another conversion done by 2022 for the On2 module. We'll see. 


GrandtLine porter kits are an amazing box of parts and wonderful kits to build. Once in a while, its good to read ahead in the instructions to know why you are doing something and how important it might be to do at that particular step. They can be really difficult if you don't know what all those pieces are for. It's a good idea to familiarize yourself a bit with what small steam locomotive parts actually do. Cliff Grandt did an amazing job of designing a scale model. Sometimes a little too to scale and you might wish that clearances were a little greater or certain parts a little oversize for strength.

I prefer the look of the saddle tank cut back behind the smokebox, so that was my only modification from the kit. I filled the saddle tank with lead shot for weight, leaving the boiler for a speaker, stay alive capacitor and a soundtrasxx economi. I  picked up two of the economi's before they went out of production. Great sound decoders at a reasonable price. Why not use a TCS WOW decoder? Well, they don't work well with the Faulhaber geared cordless motors. I can't use them in any of my PSC shays with the Faulhaber motor, nor any of my GrandtLine porters. Soundtraxx and ESU decoders do work well with these motors.

Biggest Headache
The porters do not use a gearbox. The motor fits snuggly in the ashpan/firebox but the alignment of  the motor relative to the axle is critical. How do I know? I could NOT get this engine to run well backwards. There always seemed to be a bind in the mechanism. Note: In every GrandtLine porter I have built, there has been a bind. Usually I associate this with the side rods being slightly too short from center hole to center hole. Maybe shrinkage in the plastic? Not sure but I've struggled with binds in all three locomotives. To avoid this, I ovaled out the holes a bit in the rods during construction to assure a bind-free locomotive. You can see the "slop" in the rod in the video. Worked great. After painting and assembly, major issues. Huh?!


So, after disassembly, messing around, I determined that the bind was in the drive and by moving the motor up and down slightly, I could eliminate the issue. So, I glued the motor in and reassembled it. Still a little bind in reverse but great moving forward. A gearbox would definitely eliminate this issue. If someone out there could develop a gearbox for a different motor, I bet San Juan (new owners of the GrandtLine moulds) might be willing to produce these again.....otherwise, I doubt it.

Regardless, a great looking and sounding engine that is fun to build and a pain to get running well. Maybe the next one will go easier?

Friday, June 18, 2021

Vacation Time

While visiting my in-laws recently, I had the chance to visit fellow modeler extraordinar Jeff Kaker, who is modeling the Manns Creek in On3. Jeff has an amazing talent for trying new techniques and succeeding in miraculous ways. He also happened to be a very talented modeler. I'll post his work in the future, some top secret cool stuff awaits.......While visiting, he managed to arrange visits to three amazing layouts. 

The first layout was built by Patrick Thoney. Pat is modeling the Quincy and Torche Lake in On30. Pat was a VERY gracious host, he lined up the other two layout visits, planed our outing, then replanned the outing when I had to modify my plans AND then treated us to lunch. Supper fantastic! While I've had a moderate interest in the Q&TL over the years, I've never seen anyone build a layout representing the line. There have been models, rock cars, engine house, water tank, etc. but this was the first operating layout based on the Quincy that I have seen and what a fine job it is! While I've seen his work on Facebook, I've never been able to grasp how it was set up, i.e. how it ran from one end to the other. Great track plan and I hope to get back someday to operate.


Two overview videos of the layout:


The next layout(s) were done by Gregg Condon. Gregg had both a full HO and a a full HOn3 layout. I want to say he build the Hon3 layout in 16 months? Whew!  His HOn3 layout is based on the RGS and has been featured in the NG&SLG many times. It was a quick visit and I felt that the photo's in the NG&SLG do it much greater justice than my cell phone. Here are Jeff, Gregg and myself in front of this station building, where dispatching occurs.


The final layout we visited was built by Jack Gutsch, and is based on the Chicago and NorthWestern narrow gauge in the Black Hills. The line was originally the Fremont, Elkhorn and Missouri Valley, a narrow gauge that used 4-8-0's exclusively. The Black Hills was full of cool narrow gauges, three different ones that eventually became two competitors. While there are several good books on the subject, this one is free online : Railroads of the Black Hills While this area has great history, scenery, logging, mining, little and BIG narrow gauge engines and trolleys, I've also never seen it modeled. Jack has done a wonderful job capturing the feel of the line and the surrounding area. I was impressed with the size of the towns that the line passed through and all the structures he had to build. 


                                        Overview of 1/2 the layout room:


Pat, Greg and Jack were all great hosts and each had a unique perspective on modeling. I really hope to get back to the area to operate on these fine layouts. I hope you enjoyed seeing the results of our visit to these fine layouts in Wisconsin.


Monday, May 10, 2021

A Plastic Shay?

 Yes! A plastic On3 Precision Scale Shay! I picked this up for a steal on eBay a few years ago thinking, well, if it doesn't work I at least get a Falhaulber 50:1 motor. I recently completed another GrandtLine Porter, this one for On30 and had such a fun time assembling it that figured it would be a great time to try my hand at this project. The Porter is disassembled in the paint shop, photo's eventually.......

Generally, (note not always) the instructions are excellent. You definitely want to read a few steps ahead to see what else they say before doing anything. The trucks are the first assembly. I found them easy to construct, using plastic model building techniques. Make sure you don't make a mistake with alignment or parts orientation as you don't want to have to take them apart (there's no way to unsolder as with brass). The person I bought the kit from had started the trucks and made a MESS. They used ACC glue instead of a plastic specific glue. Knowing this, I ordered some new side frames from PSC before they changed hands. You'll note in the picture that I started the frame at the same time. One thing about plastic models, you often have to really wait till the glue has dried completely before proceeding, therefore, I had two to three components being assembled at the same time. Glue a part, move to the next assembly, etc.


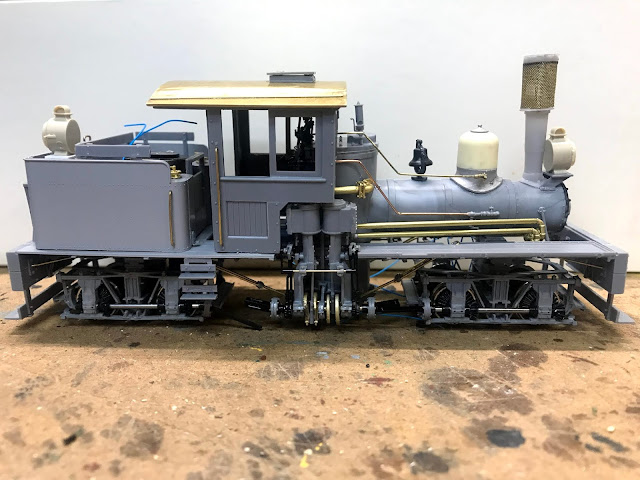
Here are some of the sub-assemblies moving along nicely. I added a Wisemann Model Services sand dome as most of this sized shay had the more modern domes.


 Here is what I have ready before painting. The decoder, speaker and headlight bulbs have not yet been added. I figured I would paint it first. Handling this thing difficult as the plastic is very fragile and flexable. In my humble opinion, the frame is too flexible. I added a second screw to hold the boiler on. There was only one, in the front! Yikes!
 
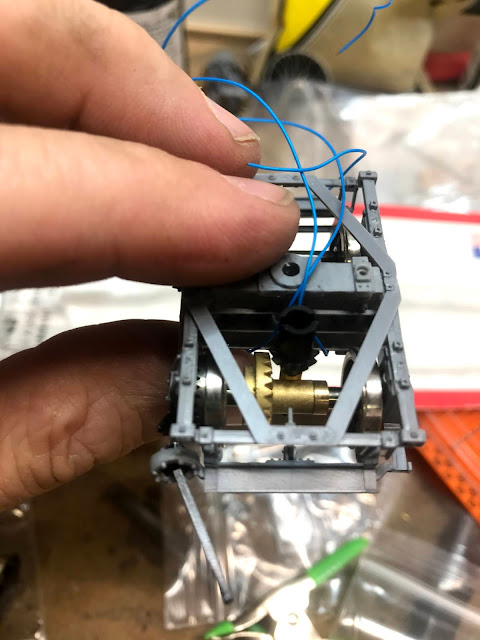
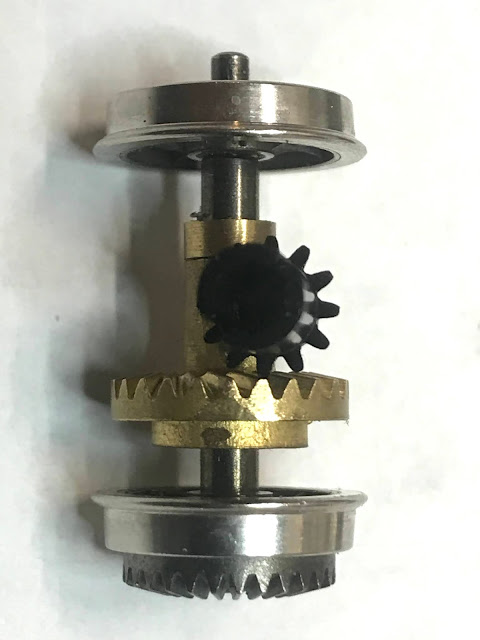
Huston, we have a problem! I've used this style of drive on all my shays, it was designed by GrandtLine and works fairly well. On this model, the gear is already mounted on the axle when you open the kit - DON'T TRUST THE MANUFACTURER! They put mine on backwards! Yup, after assembling the entire model, I found out the gears didn't align!
 

Note the large gap between the gears. The small brass mounting does not have the plastic gear centered, it is slightly off centered and needed to be mounted the OTHER WAY! But wait, this model was GLUED together.......

So, I carefully added some solvent glue to the cross bracing, brake hanger and bottom tie hoping I could remove the drivers without braking the whole thing. Well, all those little hanger broke, but sheared off, which meant I could glue them on again and hope for the best; however, the main bolster and rest of the truck stayed together.  After disassembling, pulling the driver, re-orienting the drive, I put it all back together and IT WORKS! I'm happy that it worked but was I not happy that I trusted the folks who put these together at PSC, maybe they contracted that to someone......

So, plastic shay a good idea? Hmm, easy to build using typical plastic model building skills. Build a model tank or something first. A few problems: plastic breaks easily. The frame is very flexible. There is little weight but lots of room to add weight. I added lead bird shot in the boiler and some small lead strip in the truck bolsters. The hardest parts to build - the fine detail with the eccentrics for the engine was tough. One of my eccentrics had a broken tab, making the fit impossible. I drilled and glued a brass rod on but it wasn't fun. The second hardest part - the universals that attach to the engine. The ones for the trucks were easy but the ones for engine were a bear.........

These originally sold for $275, if you can find one, it's worth the build. I wouldn't pay more unless you are a real fan of this engine. Save up and get a brass one. Once I get this painted, DDC, sound and lights, I'll post on it's running qualities. 

Cheers!